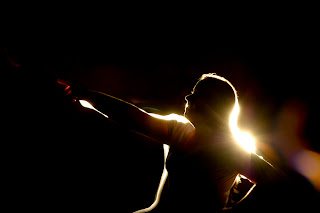
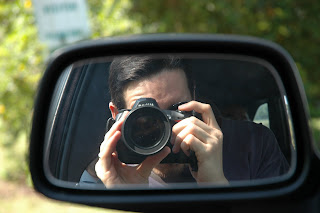
On this year's camp, I ran an elective about digital photography. It was run at night, which gave us an opportunity to try some clever tricks with light painting. The idea of light painting is to keep the camera still while you move some light around within the frame, literally painting a picture with the shutter held open. The key is to remember that the camera sees—and captures—light, for as long as the film (or sensor, in a digital camera) is exposed. Dark things like a person behind a torch don't actually get seen, but the light shining out of the torch at the camera—ah, that will make a bright spot, or a streak if the torch is moved around.
Of course, you can do more than just draw diagrams. If you put a person into the picture, you can stand behind them with your torch, and create a fabulous silhouette effect, literally wrapping them in light. You just have to keep the torch properly behind the subject's body, otherwise you'll get a very bright spot where the camera could actually see the torch itself.
The hardest part of doing this is managing to stand still enough during the exposure. You need a camera that can give you a nice long exposure. Most SLRs have a B setting, for “bulb” (it's called that for historical reasons); if you have a cable release that's even better, as it means you don't move the camera when you press the button. If don't have a cable release with a lock, you'll need an extra helper to hold the button down. Alternatively, you may be able to ask your camera to give you nice long exposure, say thirty seconds or even two minutes. You'll probably want a medium to small aperture (f/8 or higher) to ensure you don't get stray light on the background showing up. And of course, if it's a digital camera, you can check the result right away, and have another go if you don't like what you see.
We also had some fun making ghosts, but I can't show you any of those, because the campers are all recognisable in them. Or, wait, maybe I can, if I block out their faces.
To make a photo like this, the “ghost” just has to leave half-way through the long exposure. The longer they stay there, the more solid they look. Make a test shot first, and adjust the camera's aperture so that the finished image is exposed correctly for your long shutter time.
On the last elective night, we made a group portrait out on the oval. Our “light” in this case was a hand-held laser. Who needs a flash?
(I'm the one on the left, next to me is my fellow elective leader Kyle.)
 This work by Ian Bailey-Mortimer is licensed under a Creative Commons Attribution-Noncommercial-Share Alike 2.5 Australia License.
Permissions beyond the scope of this license may be available by request.


